
What is this?
My desk now has a REST API
Hardware
Things you will need:
- A Raspberry Pi (I used a Zero with a fancy steel case)
- A strip of ws2812 NeoPixels
- A 5v PSU, which, depending on how many pixels you use, may need to be quite chunky
- Some header pins
- Some dupont connectors
- A soldering iron
- Lots of wire
- Some heatshrink
- Patience
I cut the ws2812s into the required lengths (for the back of the desk and round the back of my monitor). Once I had these strips:
Attaching pins
Directly wiring the strips together would have made the whole thing very unwieldy, so I chose to attach header pins instead. First, I stripped the silicone from the pins:
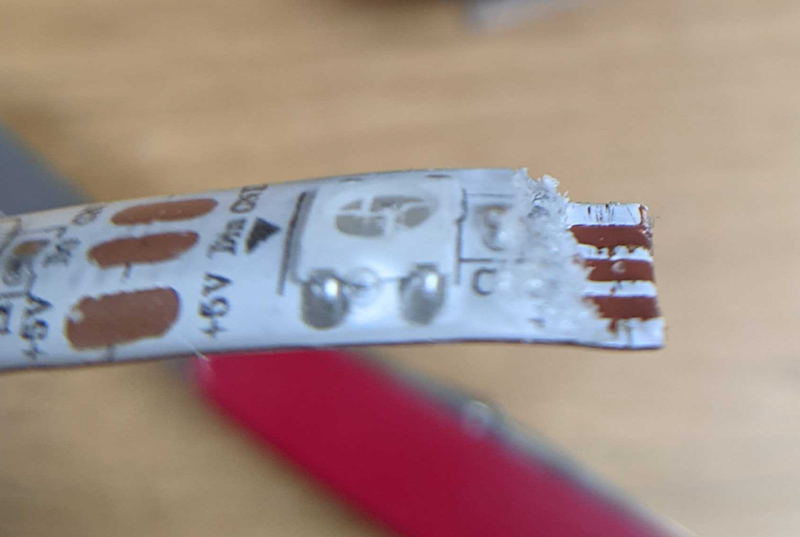
using a (not very sharp) Swiss Army knife. As you can see, I made a mess of this (and this is one of the better ones, that I chose to photograph), but I doesn't really matter because it's going to get covered up with terrible soldering anyway.
An important point here: GET AS MUCH OF THE SILICONE OFF AS YOU CAN, YOU DO NOT WANT YOUR SOLDERING IRON TIP TO GET MELTED SILICONE ON IT AS THIS MAKES IT SOLDER-RESISTANT. Do not ask me how I know this.
So once it's stripped, apply some solder to each of the terminals:
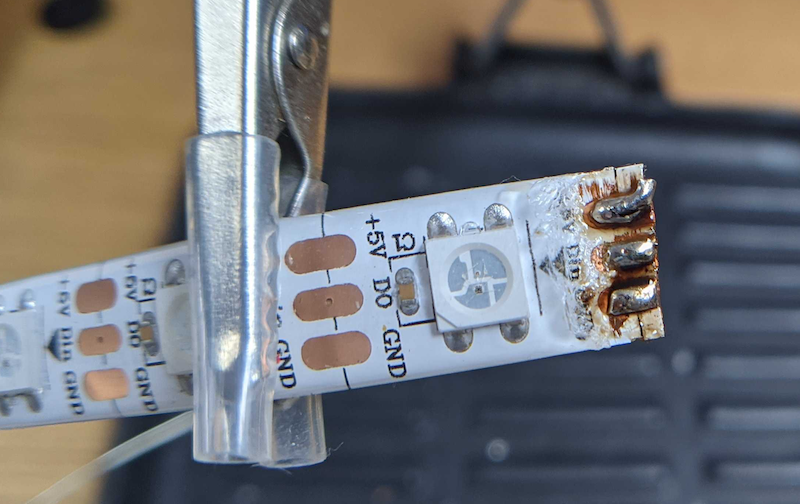
Yes I know this is a hell of a mess, my soldering-iron tip was fucked for some reason.
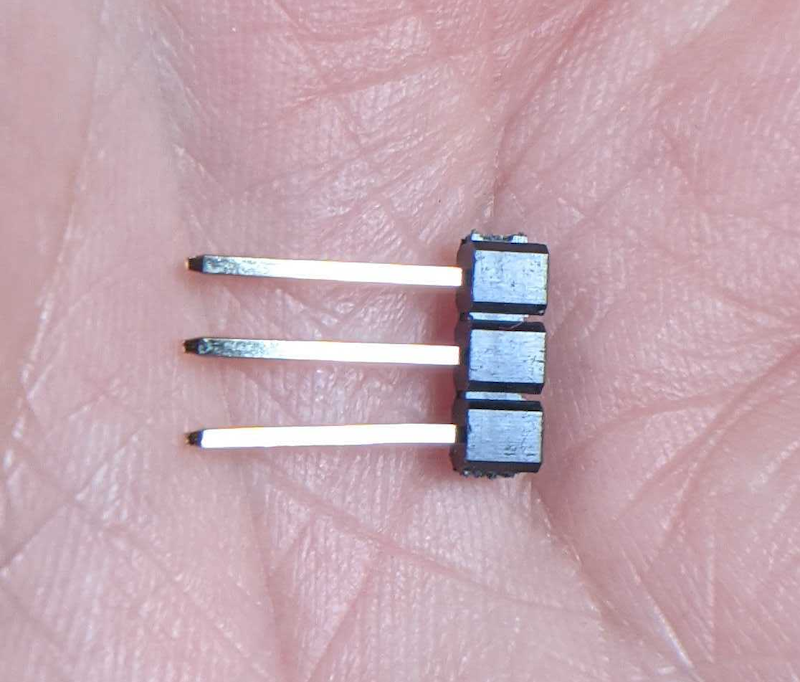
Now break off three of the header pins:
and solder them in place:
Remove the plastic spacers and you're done:
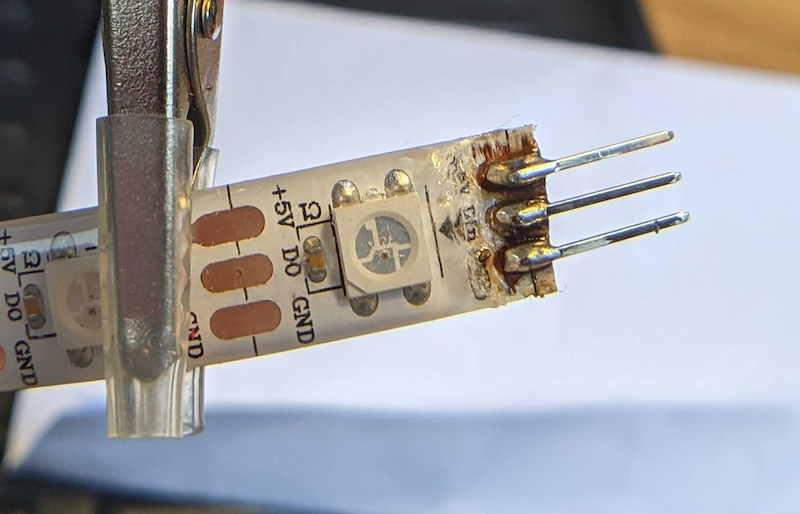
Yes, this is an incredibly ugly joint, but
- I'm bad at soldering
- My soldering iron had a fucked tip
- This will all be hidden away anyway
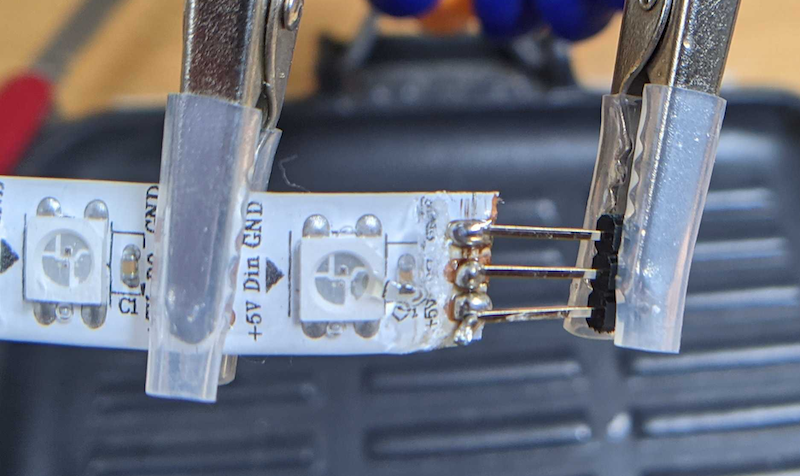
Now do this for each end of each of your strips. I thoroughly recommend doing at least a continuity test for each strip you solder, or better yet, pushing some actual data through (I discovered a few duff joints which would have been much harder to remedy once everything was properly installed).
Installing the strips
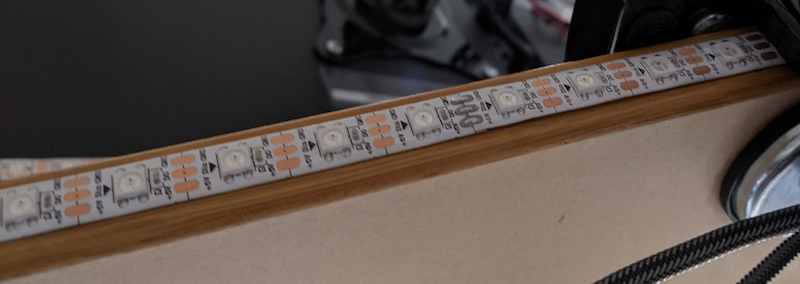
OK now you can stick the strips where you want them:
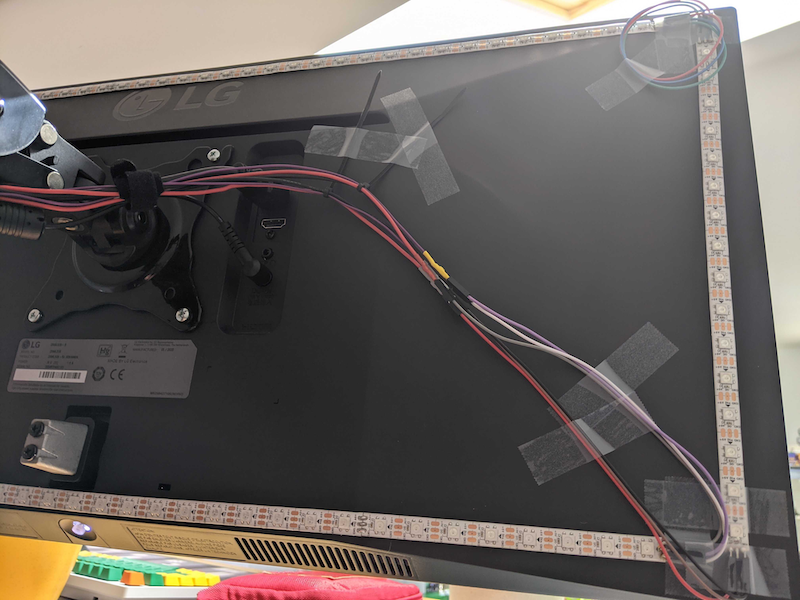
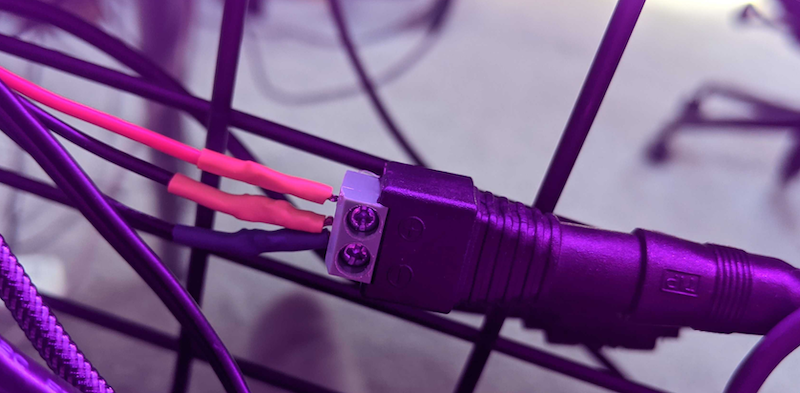
and wire them together. I did make some custom cables using the Dupont connectors, but it's much easier to just use breadboard jumper wires tbh.
Some things to note here:
- there are arrows on the strips indicating the direction of data and current flow. PAY CLOSE ATTENTION TO THESE when sticking-down and wiring-up your lights, otherwise you'll run into hard-to-diagnose problems later on. Once again, don't ask me how I know this
- be aware when creating a corner that the pins add an extra centimetre or
so at each and of a strip, and whatever kind of connector cables you use
will have a finite cornering radius, so maybe make each strip 1 pixel
shorter than you think you need
- I did attempt to make some 90-degree cables of the exact length required to solve this problem, using the Dupont connectors. I can recommend not even contemplating this
Connecting it all up
Connect the power
and the Pi
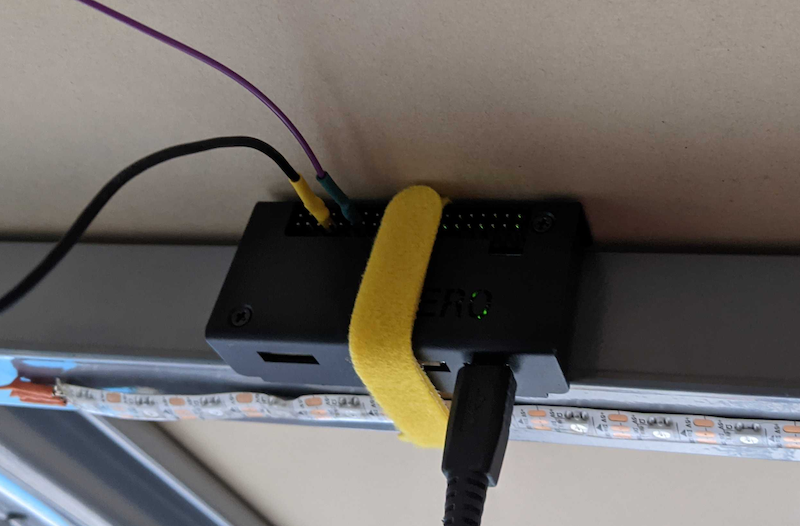
Connect
- PSU +5v to the NeoPixel +5v
- PSU GND to NeoPixel GND
- PSU GND to Pi physical pin 6 (GND)
- Strip DATA to Pi physical pin 12 (GPIO 18)
Note: I AM NOT AN ELECTRICIAN, DO THIS AT YOUR OWN RISK
Configuring it
While the NeoPixels present themselves to the Pi as one continuous strip,
indexed from 0 to length - 1,
light-emitting-desk expects them to be defined as
sectors in conf/conf.yaml. Take for example the
lights on the back of my monitor: looking from behind, the lights start from
the bottom-right, go across to the left, up the left-hand side, back across
the top, then down the right-hand side, forming an anti-clockwise loop.
However I want them to appear logically as starting at the bottom-middle and
going around clockwise back to the bottom-middle (which makes more sense in
the context of the whole desk). So they're configured like this:
sectors:
  monitor:
    - [111, 94]
    - [197, 182]
    - [181, 146]
    - [145, 130]
    - [129, 112]
which means start at physical index 111 and go to
94 (bottom-middle to bottom-right), then 197 to
182 (bottom-right to top-right) and so on. I expect this makes
slightly more sense in the context of transition
modes.
Installing the software
From a box-fresh install of Raspberry Pi
OS Lite, presuming you can ssh to it:
(Optionally) change the hostname:
sudo raspi-config nonint do_hostname led
sudo reboot
You need git:
sudo apt update && sudo apt install -y git
Then clone this repo:
git clone https://github.com/pikesley/light-emitting-desk
And install everything:
cd light-emitting-desk
make setup
Now edit
conf/conf.yaml to reflect your particular lighting set-up,
and restart it:
make restart-services
Now point your browser at http://led.local and you should see something like this:
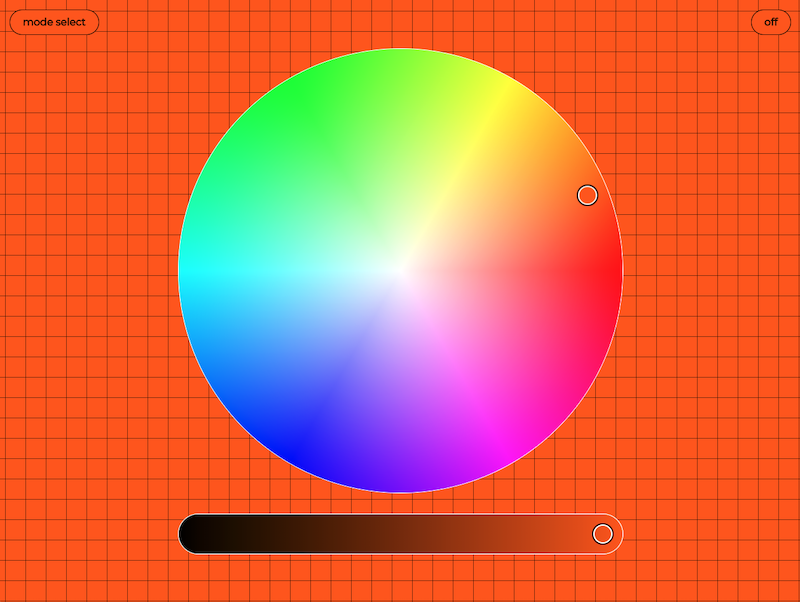
and you should be able to make the lights change!
API
Setting the lights
POST /desk/light
with a JSON payload like
{
    "colour": [250, 129, 0],
    "mode": "sweep",
    "direction": "forwards"
}
will turn all the lights orange, using the sweep lighting
mode
Retrieving the current colour
GET /desk/colour
will return the current colour:
{
    "status": "OK",
    "colour": [250, 129, 0]
}
Modes
Just flipping all the lights instantly is a little dull, so I built some transition modes:
sweep
This lights each pixel in the desired colour, starting from one end (of the
logical strip) and chasing along to the other. The web-interface alternates
between chasing forwards and backwards for each
invocation.
spot-fill
This randomly selects one pixel at a time to switch, until they're all set.
converge
This starts at either end of the logical strip and chases the new colour to the middle.
sector-diverge
This simultaneously lights each sector from the centre to the ends.
direct-switch
This just throws a switch and flips all the lights at once.
Note: each of the modes apart from
direct-switchhonour adelayparameter in their JSON, which indicates how long to sleep between each step of the transition. It defaults to0.01seconds, which seems to work pretty well.
Queue
Some of the transitions take a little while to happen, so in order to avoid blocking web requests while we wait for hardware things, there's a job queue.
I started with RabbitMQ but this is clearly massive overkill, and it felt like I was deliberately punishing the Pi Zero for no good reason. I investigated RQ, having had success with Resque in my Ruby days, but I felt like I was having to work around what it wanted to do. I then discovered that Redis has FIFOs built-in, so I lashed together a custom queue and worker.
It has no resiliency of any kind (other than what it gets for free from Redis), but it's really, really simple and it works just fine for this.
Developing it
If you want to play with the code, there's some Docker tooling:
make build
make docker-compose
This spins up a Selenium server, an
instance of light-emitting-desk running the webserver (to run the
UI tests against), and another instance for you to work in. To connect to this
(in a different terminal) do:
make run
Then from there, to run the linters and tests,
make
This runs:
blackandisortpylamapytestto test the Python backendjasmineto test the front-end JavaScript, andnightwatch(viaselenium) to test the UI
because there's nothing I'd rather spend my Easter weekend doing than massively over-engineering a stupid project like this.
Front-end
If you want to improve the design (and I'm very much here for that), you might want to run
make sass
and then in a different terminal
python webserver.py
and it should be running at http://localhost:5000. The HTML is in templates/ and the Sass is under sass/.
Pushing new code to your Pi
If you set PIHOST at the top of the Makefile,
then you should be able to push new code to the Pi with
make push-code
You'll need to restart things on the Pi to pick up your changes:
cd light-emitting-desk/
make restart-services
Next steps
I already have a third strip of lights fitted under my desk, but I've reached the limit of what my little PSU can handle and they won't light properly. I have a 10A PSU coming soon, which should solve that problem.